Login options
Weitere Optionen
HITGuard supports the Authentication Provider Active Directory (AD), Azure Active Directory (AAD), Active Directory Federation Services (ADFS) and OpenIdProvider.
Active Driectory
The Active Directory is the only Authentication Provider that can be set at runtime of HITGuard. It can be configured by administrators and experts in the Global Settings.
More about Active Directory configuration can be found at "Administration → Global Settings → LDAP".
Azure Active Directory
To configure the Authentication Provider AAD or ADFS, the "appsettings.production.json" file of HITGuard must be modified. This file is located in the root directory of the installation folder.
In the AzureAd section, the following entries need to be customized to your Azure app:
- "Activated": true,
- "Instance": "https://login.microsoftonline.com/",
- "HITGuardBaseUrl": "https address where your HITGuard instance is accessible",
- "ClientId": "your-clientId-guid",
- "TenantId": "your-tententId-guid",
- "ClientSecret": "your-tententId-guid",
Single Sign On (SSO)
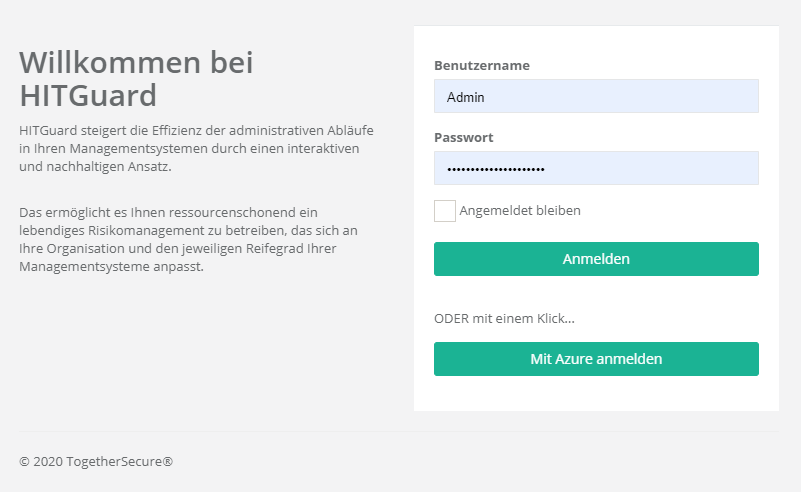
If the AAD is now set up as the Authentication Provider for HITGuard, users can log in to HITGuard via Single Sign On (see figure below).
The prerequisite is that a user exists in HITGuard whose e-mail address matches the e-mail address used to log in to AAD. This is because: When logging in via AAD for the first time, this is used to connect the AAD user with the HITGuard user. Subsequently, the e-mail address of the HITGuard user can be changed if necessary.

Active Directory Federation Services
To configure an ADFS you have to proceed similar to the Azure Active Directory and add in the "appsettings.production.json" file the entries
- "MetadataAddress": "https://adfs.yourcompany.com/FederationMetadata/2007-06/FederationMetadata.xml",
- "Wtrealm": "https://www.hitguard.com/"
configure.
Single Sign On (SSO)
Siehe Azure Active Directory (AAD) SSO.
OpenID Connect Provider
To set up an OpenID Connect provider, changes must be made in the "appsettings.production.json" file. OpenID Connect offers many flexible settings that can be customised depending on the provider.
Steps for configuration
- Add the configuration in the "appsettings.production.json" file.
- Make sure to use the correct "ClientId", "ClientSecret" and "Authority" for each provider. This information is different for each OpenID Connect provider and must be configured according to the respective providers. In addition, a corresponding unique "CallbackPath" must be defined for each provider, as well as a "Name" that is used for the login button.
- Set the setting "OpenIdConnect.Enabled" to "true" so that the providers can actually be used.
- Important Restart the application after changing the configuration by doing this via the IIS Manager (ideally with "stop" and "start", as "restart" sometimes does not restart the application completely).
If you have any further questions about configuring an OpenID Connect provider, please contact "office@togethersecure.com".
Example configuration
The following example shows how you can configure Google and Microsoft (without Active Directory) as OpenID Connect providers.
The Microsoft integration also shows how to use a custom claim so that existing users can log in directly with their Microsoft account without linking the account to their profile (see Profile).
{
"AllowOpenIdConnectUserMappingByUsername": true, // Allow mapping of OpenIdConnect (or Microsoft Entra ID) user with HITGuard user by OpenIdConnect username with HITGuard user's username when first logging in with OpenIdConnect if activated. (i.e. the OpenIdConnect account gets associated with a hitguard user that has a username, see "HitGuardUserNameClaim" to configure which claim provides the username)
"AllowOpenIdConnectUserMappingByEmail": false, // Allow mapping of OpenIdConnect (or Microsoft Entra ID) user with HITGuard user by OpenIdConnect username with HITGuard user's email when first logging in with OpenIdConnect if activated. (i.e. the OpenIdConnect account gets associated with a hitguard user that has a matching email)
"OpenIdConnect": {
    // If you need to authorize redirect URIs at the Provider, authorize '{HITGuard-domain}/Account/ExternalLoginCallback'
    "Enabled": true,
    "Providers": [
      {
        "Name": "Google", // This name will be displayed to the Users and needs to be unique. Entering 'Google' would for example display as Login with Google
        "Authority": "https://accounts.google.com", // needs to point to the domain where the provider hosts the '/.well-known/openid-configuration', for google this would be e.g. 'https://accounts.google.com'"
        "ClientId": "[Google-Client-Id]", // ClientId for your Application with the Provider
        "ClientSecret": "[Google-Client-Secret]", // ClientSecret for your Application with the Provider
        "CallbackPath": "/signin-oidc-google", // CallbackPath registered with the Provider, must be unique from other providers. Choose any valid path e.g.: '/signin-oidc-google
      },
      {
        "Name": "Microsoft",
        "Authority": "https://login.microsoftonline.com/[Microsoft-Tenatn-Id]/v2.0",
        "ClientId": "[Microsoft-Client-Id]",
        "ClientSecret": "[Microsoft-Client-Secret]",
        "CallbackPath": "/signin-oidc-microsoft",
        "GetClaimsFromUserInfoEndpoint": true, // If set to true additional claims will be retrieved from the UserInfo endpoint, by default this is false so it will only look at claims in the ID_token, set this to true, if you configure a different "HitGuardUserNameClaim" and do not include it in the ID_token
        "HitGuardUserNameClaim": "hitguard_username", // If AllowOpenIdConnectUserMappingByUsername (toplevel) is set, this property can be used to customize which claim will have the hitgurad username that should be matched. The default of this is the "preferred_username" claim which should be present in the "profile" scope. If this is set to a different value, the Identity Provider needs to be configured to actually include the configured claim in the ID_token (or UserInfo endpoint, which requires "GetClaimsFromUserInfoEndpoint": true) returned to HITGuard.
      }
    ]
  }
}
Notes
- The `ClientId` and `ClientSecret` must be created individually for each OpenID Connect provider account. You can obtain these directly from Google or Microsoft when you register an application in the respective developer portal.
- Make sure that the callback URL is configured correctly. This URL is used during the authentication process to receive the response from the provider.
- If you want to use a custom claim to map to username, you must ensure that the OpenID Connect provider returns this claim via the ID token or the UserInfo endpoint and configure it accordingly in "appsetting.production.json".